

So you want to learn rope bondage. That’s you and millions of other people in the world.
The B in BDSM is one of the most universal and widespread kinks there is. Many fantasize about it, but only a few will actually try it out in real life because of how complicated and cumbersome it looks.
Buying the first few sets of rope can be exciting—exhilarating, even. You’ll immediately want to imitate the most complex bondages you can find on the internet.
Aspiring riggers should know that rope play will demand a lot of poise, patience, and practice to perfect the craft. It’s an art form that is pretty challenging to get into initially, but with enough practice, you’ll be able to tie your partner up with finesse (and probably in under a minute).
You’ll also need to make sure you and your partner are in agreement over what’s about to happen next. Negotiating and drafting a BDSM contract can help clear things up between you and your partner before you start tying them up.
Before we get into our rope lessons, we’ll need to have our tools and equipment ready.
What You’ll Need for Rope Bondage
1. Rope
This one is a no-brainer. However, it is still worth mentioning that not all ropes are created equal—each one has a specific function and purpose you’re going to want to look into. After all, the rope is at the heart of bondage, so you shouldn’t rush in choosing what would best suit you and your partner.
Beginners don’t have to splurge on hemp or jute just yet, which are the ideal ropes for bondage play given their durability and flexibility but can be quite expensive to own. Instead, opt for the more affordable white nylon rope, cotton rope, or synthetic rope. Just make sure the said rope flattens a bit under pressure and won’t leave splinters on the skin.
How are they different, you ask?
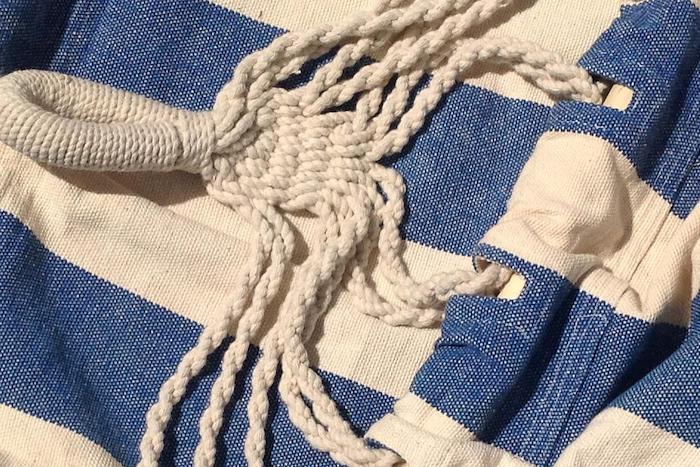
Cotton rope is the most convenient to buy, usually found for cheap in hardware stores. It bites into itself better than nylon, making it less slippery to use but can be particularly frustrating to manage the knots if it ends up being a loose braid. Make sure to have your safety shears by the bedside table.
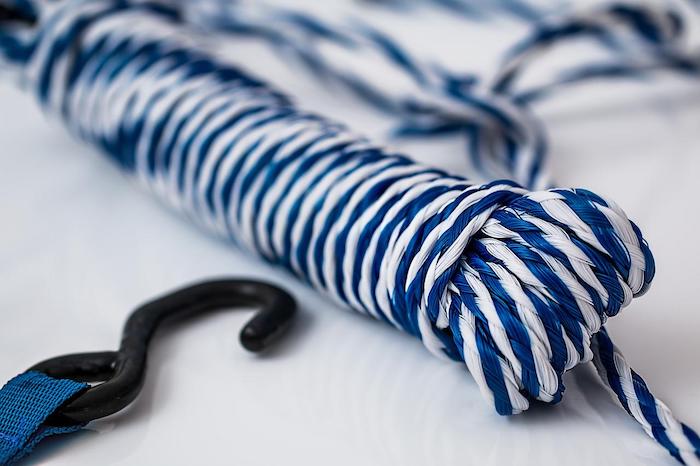
Meanwhile, nylon rope is the most durable of the three, making it a preferred pick for many in the bondage community. It can be used for extended periods of suspension, especially among those who are allergic to natural rope fibers.
On that note, you can also settle on a synthetic rope if natural fibers tend to irritate or burn your skin during rough play. Because of how smooth it is, it results in a lot less friction. It’s thin, light, and appealing to the eyes as it can come in numerous colors. However, the catch is that it being essentially weightless means the synthetic rope will not stay in place and could slide over or ride up your skin.
2. Safety shears
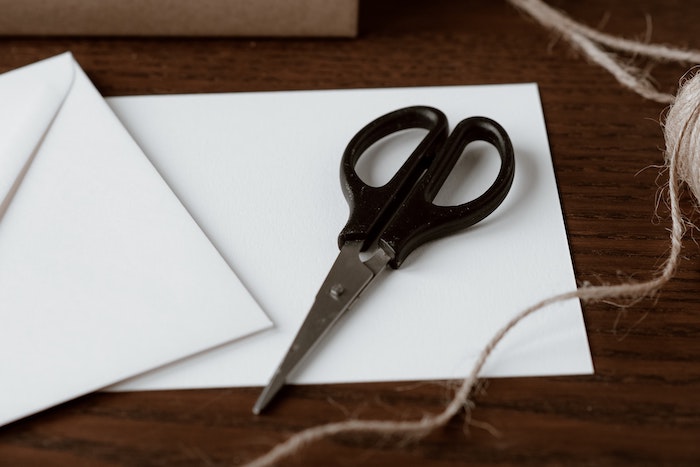
You could already be an expert in rope bondage, but you’re still going to need shears as a safety precaution for BDSM activities. It’s either that or a visit to the hospital in the case of emergencies. Having safety shears on the bedside table isn’t enough—you’re going to have to practice cutting rope, too. Try to cut a number of chunks off one end of a rope. Familiarize yourself with how tough it can be to do so. At the same time, don’t underestimate what a swift cut is capable of.
In any case, go for EMT shears, which are medical-grade scissors that can cut through almost anything—rope and leather included. Just make sure to dedicate those shears to bondage and bondage only. Using them around the house to open snacks or for arts and crafts will wear it down and blunt the edge, which you’ll need to be extra sharp to cut through rope.
Pro-tip: We recommend purchasing the bondage tools you need on Amazon or hardware stores. Buying products from BDSM shops is usually exactly the same as its normal counterparts but with a crazy markup.
The Art of Japanese Rope Bondage
There’s a certain order to properly learning the art of Japanese rope bondage—or shibari, for short.
Starting with the basics grants you the fundamental knowledge you’ll need to build more complex ties later on. You’ll find that there are multiple variations of the same ties, but below are some of the cleanest, most effective methods to do shibari, as per Autostraddle’s instruction:
1. Single column tie
Learning the single column tie is a non-negotiable in rope play. It’s the crawl before the walk, the foreplay before intercourse. This starting point will quite literally tie everything you’ll know about rope bondage together in a firm hold.
In this tie, the column represents any vertical arrangement in the body: arms, torso, legs, wrists. The leftover end of the rope can then be used to tie around a chair rung or a bedpost. You get the idea. Single column tie is frequently used with other tying methods, but it can also be a star on its own. For one, the basic spread eagle position can be secured in place with something as simple as the single column tie, having one limb roped to each corner of the bed.
- Take the rope and make a bight (a U-shaped fold in the rope where two parts lie alongside each other but do not cross).
- Wrap the doubled rope length around your partner’s wrist at least twice without overlapping each other to avoid placing too much pressure in one spot.
- Turn the bight into an adjacent position over the initial two wraps.
- Place the bight beneath the wraps (this is to prevent the wraps from pushing down against your partner’s skin and bruising them during rough play).
- Pull the bight through beneath the wraps.
- Create a simple loop using the other end of the rope.
- Slip the bight through the loop.
- Place the bight beneath the wraps once more.
- Put the bight back through the loop.
- Pull the loop shut.
2. Double column tie
Take everything good in a single column tie and make it greater—you’ll have the double column tie. It’s twice the fun since it can bind two columns together: a wrist to an ankle, an anklet to a chair leg, an arm to a thigh. The possibilities are endless!
Instead of just wrapping the bight under the top set of ropes like in the single column tie, the double column tie has the bight both over and under the set.
- Take the rope and make a bight.
- Wrap the double rope length around both columns at least twice without overlapping each other to avoid too much pressure in one spot.
- Cross the bight over the other end at the top and center of the column.
- Pass the rope through the columns.
- Create a loop with the other end of the rope.
- Slip the bight through it.
- Create another loop with the other end of the rope.
- Slip the bight through it.
- Pull to lock the knots in place.
3. Chest harness
Rope bunnies rejoice! Shibari is more than restricting bodily movement. It can also provide a sense of confinement for the submissive, which is in itself a major turn-on. The chest harness is here to deliver.
A chest harness can be styled and crafted in many ways: there’s bulldog, bikini, shinju, diamond, pentagram, hexagon…and these are just some of the more popular examples.
What we mean to say is that it has a ton of decorative potential. You can also incorporate what you’ve already learned above by using the loose ends of the single or double column ties to attach them to a chest harness.
Before exploring its many variants, here’s how to make the less intimidating chest harness that is as versatile as it is simple:
- Position the bight at the center of the back.
- Wrap the rope below the chest.
- Slip the working ends through the bight.
- Take the same working ends over the shoulder and to the front area.
- Bring them over the top ropes in front, then under the bottom ropes.
- Pinch the bottom ropes together to keep the shape while putting the working ends in a reverse direction.
- Place them back up under the top ropes.
- Pull the working ends over the shoulder and around the bottom rope.
- Pass them over the top right ropes.
- Create a diagonal line from the top left rope to the left shoulder rope.
- Bring the working ends over both shoulder ropes and underneath the right top ropes.
- Make a half hitch on the stem by forming a loop in the working ends and bringing the ropes over the stream, behind the steam, and through the loop
- Pull to secure and tighten
4. Futomomo
Here’s another classic in shibari: the Futomomo binds the ankle to the thigh, restricting body movement in floor-level bondage play. It’s a particularly painful position to be in, especially when kneeling for extended periods of time, but that’s precisely where its appeal lies.
Since Futomomo is all about the legs, practicing this bondage on yourself is more doable than the earlier ties discussed. You’ll know a Futomomo is done correctly when the force of the tie is distributed across the entire leg and not concentrated on one part.
- Tie a single column tie on the ankle.
- Push the shin to bring the ankle close to the lower thigh to lock the column in place.
- Spiral the working ends up the leg, with the first wrap low on the thigh (spiraling can go from two to four wraps, depending on the size and comfort of the leg being tied).
- Pass the end of the rope over itself on the inside of the knee.
- Insert a finger through the triangle created.
- Grab the rope and pull underneath, with the other hand used to pinch where the ropes cross to secure the position.
- Bring the working ends over the top rope then under the left rope.
- Repeat the knot on each rope, working down the spiral.
- Pass the working ends through the leg and around to the outside of the leg.
- Repeat the knot on the outside of each rope of the spiral until the top, but now the working ends are running up the leg instead of down.
- Finish the tie by bringing the working ends through the loop of the top rope’s knot.
- Twist any leftover rope around the stem.
- Secure with a hitch and tuck the ropes around the steam for a clean finish.
5. Hogtie
Nothing says complete submission like a good hogtie. This bondage will require your partner to lie stomach-flat on the floor at your total mercy. Having arms bound at the back with feet ratcheted up in the air can be very intense—and very sexy. However, because of how restrictive the hogtie position can be, there’s not much you can do with this tie.
Still, we’re not ruling out this classic. The confinement it brings already does a lot just by itself. Try it out yourself.
- Tie a chest harness (avoid any knots in the sternum or other sensitive areas on the chest).
- Have the bottom lie down stomach-flat on the floor.
- Use the ends of the leftover rope from the chest harness to incorporate a single column tie around the wrists to bind the arms.
- Make a double column tie on the ankles.
- Slip the working ends of the ankle rope through the center column of the chest harness.
- Loop the rope back through the bight at the ankle.
- Repeat this to the center column of the chest harness.
- Tighten the tie to lock the ropes in place.
- Finish with at least two half hitch movements.
6. Takate-kote
The takate-kote is the go-to box tie used by most riggers, which you’ve likely seen around. More often than not, the typical restrictive ties that you see with the arms bound in the front or behind the back is takate-kote. It’s also frequently used in suspension, so this is a must-know if you want to level up in your rope game.
Before you tie your partner up in this position, make sure they are flexible enough to have one hand in the crook of the elbow and the other cupping that elbow. Inability to get into that position puts them at risk of impacted blood vessels.
- Position partner’s arms at the back with the wrists facing each other.
- Bind the wrists together using a single column tie.
- Bring the working end across the middle-lower part of the deltoid.
- Cross the rope on the front upper chest.
- Place across the deltoid of the other shoulder.
- Have the working ends straight across the back and on top of the centerline.
- Cross the rope on the front upper chest once more (make sure to keep the tension the same and lines parallel with no twists in sight).
- Bring the rope to the back.
- Lock the strap using an X Friction method.
- Create the second strap by placing the rope across the triceps to the middle of the chest.
- Run the rope over the middle of the other arm.
- Bring the working end under the centerline to make a second wrap parallel to the first.
- Lock the strap using an X Friction method.
Tie Responsibly
If you’re having a hard time following the written instructions, don’t fret! Visual learners can also look up the step-by-step process on YouTube. There are also various local rope communities to join on the internet.
For a deeper dive into shibari, shibaristudy.com, theduchy.com, shibariclasses.com, and autostraddle.com are some of the best online resources to learn how to tie.
It’s also helpful to know the basic knots most used in shibari, such as a square knot, half hitch, sheet bend, Lark’s head, Munter hitch, and taut line hitch. Familiarizing yourself with how these knots are applied to more involved ties can quickly expedite what otherwise would be a slow learning curve for a beginner.
Remember, rope bondage is edgeplay. Don’t get too ahead of yourself trying to copy elaborate full-body bondages from porn without first mastering the basics. In fact, you might want to shy away from taking all your bedroom moves from porn altogether.
A good rule of thumb is that there should be enough room to slide two fingers beneath the ropes, but not enough for your partner to set himself loose. If a person is roped too tight, it could result in friction burn, circulation cut-off, or irreversible nerve damage.
That said, play it safe!